

What each venue needs
Here is the balance each kind of trade draws from, and what to send there:
You also need a little of each chain’s native coin (ETH, SOL and so on) for gas on that chain. AI credits for the app chat are a separate balance again and are not covered here; see Models and AI credits. The diagram shows how money reaches each venue:
What you need
- A connected agent or the app chat.
- Funds somewhere: crypto in another wallet or exchange, or a card, bank account or UPI for an onramp.
Steps
1
See where your money is now
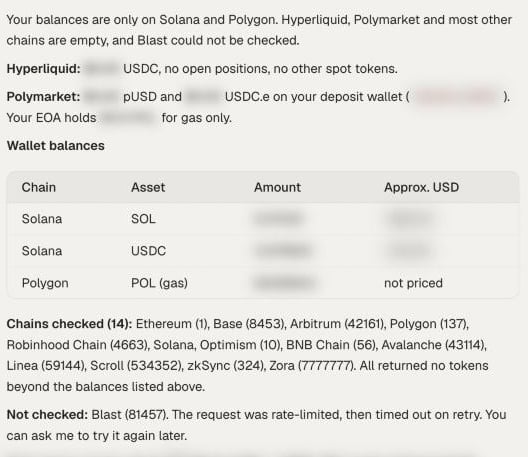
Balances per venue in chat, with the chains that were checked
2
Get the right address
Ask for the address of the venue you want, never reuse one from memory:You can also open Deposit in the app and pick the EVM, Solana or Polymarket tab. See Wallet.
3
Send funds from outside (moves money)
From your exchange or other wallet, send exactly the token and network in the table above. Send a small test amount first if you have never used that address.
4
Or buy with a card, bank or UPI (moves money)
5
Move wallet funds onto the venue (moves money)
Paying in INR
Onramp.money handles INR through UPI, IMPS and bank transfer, and supports a fixed set of token and network pairs. USDC is available on Polygon and BNB Chain only. To reach Hyperliquid from INR:1
Buy USDC on Polygon (moves money)
2
Bridge to Arbitrum (moves money)
3
Deposit to Hyperliquid (moves money)
Check it worked
Once the funds have landed, ask for both venue balances:Common mistakes
- USDT or USDC.e to Hyperliquid. Hyperliquid accepts USDC only, deposited from Arbitrum.
- pUSD to your main wallet address. It is not tradeable on Polymarket until it is moved to the deposit wallet.
- No gas on the chain you swap or bridge from. Keep a little native coin there.
- Expecting the onramp to fund a venue directly. It delivers to your wallet. Depositing is a second step.
- Checking one chain and concluding the wallet is empty. Ask for every chain.
Next guides
Move funds between chains
Bridges in detail, with status checks.
Polymarket from research to redeem
Your first prediction market trade.