

Every trade needs your confirmation, and nothing here is financial advice. Start with a small amount while you learn how the app behaves.
Before you start
You need an email address and some crypto you can send from another wallet or exchange: a stablecoin such as USDC, and a little of the network’s own coin for gas.Steps
1
Sign up with your email
Go to openfinance.tech and click Sign In (inside the app the button reads Join now). Enter your email and the code you receive. You land in Chat.
2
Read and accept the welcome disclaimer
The first time you sign in, a disclaimer explains that the product is experimental, that AI can be wrong, and that your API key gives full access to your wallet. Tick all four boxes, then click I understand & agree.
3
Find your wallet
Your embedded wallet and your API key are created automatically. Open Wallet in the sidebar to see it. If you see “Your agent key is still being set up”, wait a moment; balances load as soon as it is ready.
4
Deposit funds
Click Deposit in the top bar, then Deposit again in the panel. Pick the EVM, Solana or Polymarket tab, then scan the QR code or copy the address and send funds to it from your other wallet or exchange. Deposit funds explains which tab to use for each venue.
5
Add AI credits
AI replies are paid for with AI credits. Open the same top bar panel and click Buy credits. Choose a network, enter an amount and confirm. The stablecoin is sent from your OpenFinance wallet and the credits are added automatically. See Buy with crypto for each screen.
6
Ask the chat
Open Chat and start with a read-only question to check everything works, then ask for the trade you want. Be specific about the market, the side and the size.
7
Confirm the trade
Before anything that can move funds or place an order, the chat shows a Confirm this action card with the details. Check them, then click Approve & run, or Deny to cancel. The result appears in the chat.
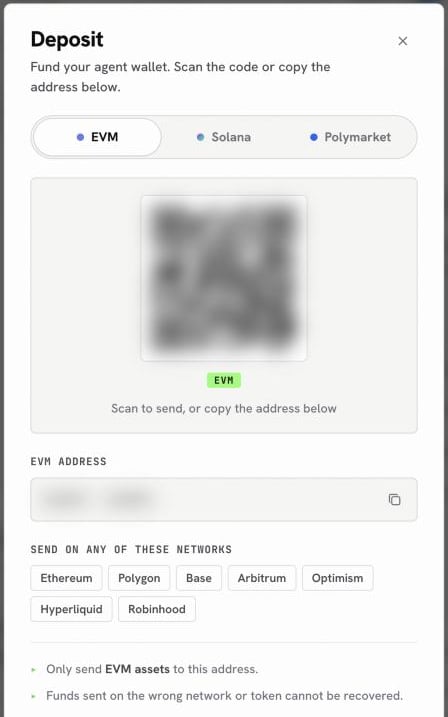
The Deposit sheet: pick a tab, then scan the code or copy the address
Which funds go where
Send the right asset on the right network. Funds sent on the wrong network or token cannot be recovered.
Hyperliquid accepts USDC only, and its deposits come from Arbitrum. The Polymarket address is a separate deposit address, not your EVM address, so always copy it from the Polymarket tab.
First prompts to try
Once your deposit has arrived, these prompts take you from checking your setup to a small first trade. Start by checking your setup:If something does not work
The chat says I have no AI credits
The chat says I have no AI credits
New accounts start with no credits. Click Buy AI credits on the message, or Buy credits in the top bar panel. The free models also need a funded account: the app asks for a minimum deposit of $10 before you can use them, and they do not spend your credits afterward.
My deposit has not shown up
My deposit has not shown up
Open Wallet and click Refresh. Check that you sent the asset on a network listed in the Deposit sheet. Balances are read from the chain, so a transfer that is still confirming will not appear yet.
The reply stopped halfway
The reply stopped halfway
A paused run shows a Continue run card. Click it to pick up from the last step. The agent is told not to repeat any trade that already went through.
Next
Chat
Modes, starter prompts, attachments and confirmation cards.
Wallet
Balances, deposits, sending and key export.
Models and AI credits
Pick a model and understand how credits are spent.
Deposit and buy credits
Funding each venue and topping up credits.